- Jun 22, 2025
Aperture Priority Mode in Photography: When and How to Use It (Part I)
- Dejan
- Camera Settings
Published in the Free Content
The exposure mode labelled “A” or “Av” on the dial is known as aperture priority. When shooting in this mode, you are able to determine the aperture size by selecting an f-number on your camera, which is a simple operation. Once you have set the desired f-number, for instance f/5, the camera will automatically adjust the shutter speed to ensure the correct exposure of the photograph. Since you and the camera both make a decision (you choose the aperture, the camera adjusts the shutter speed), it can be concluded that this is a semiautomatic mode. “Semiautomatic” implies easy use, as the camera handles half the work.
The aperture is a physical part of the lens and can be found at its back end. Its opening becomes larger or smaller depending on which f-number you select (Figure 1). The aperture size (f-number) will likely be one of the most critical decisions in the majority of the photographs you will take in the future. Its significant importance derives from the fact that the aperture size largely determines the depth of field in a photograph.
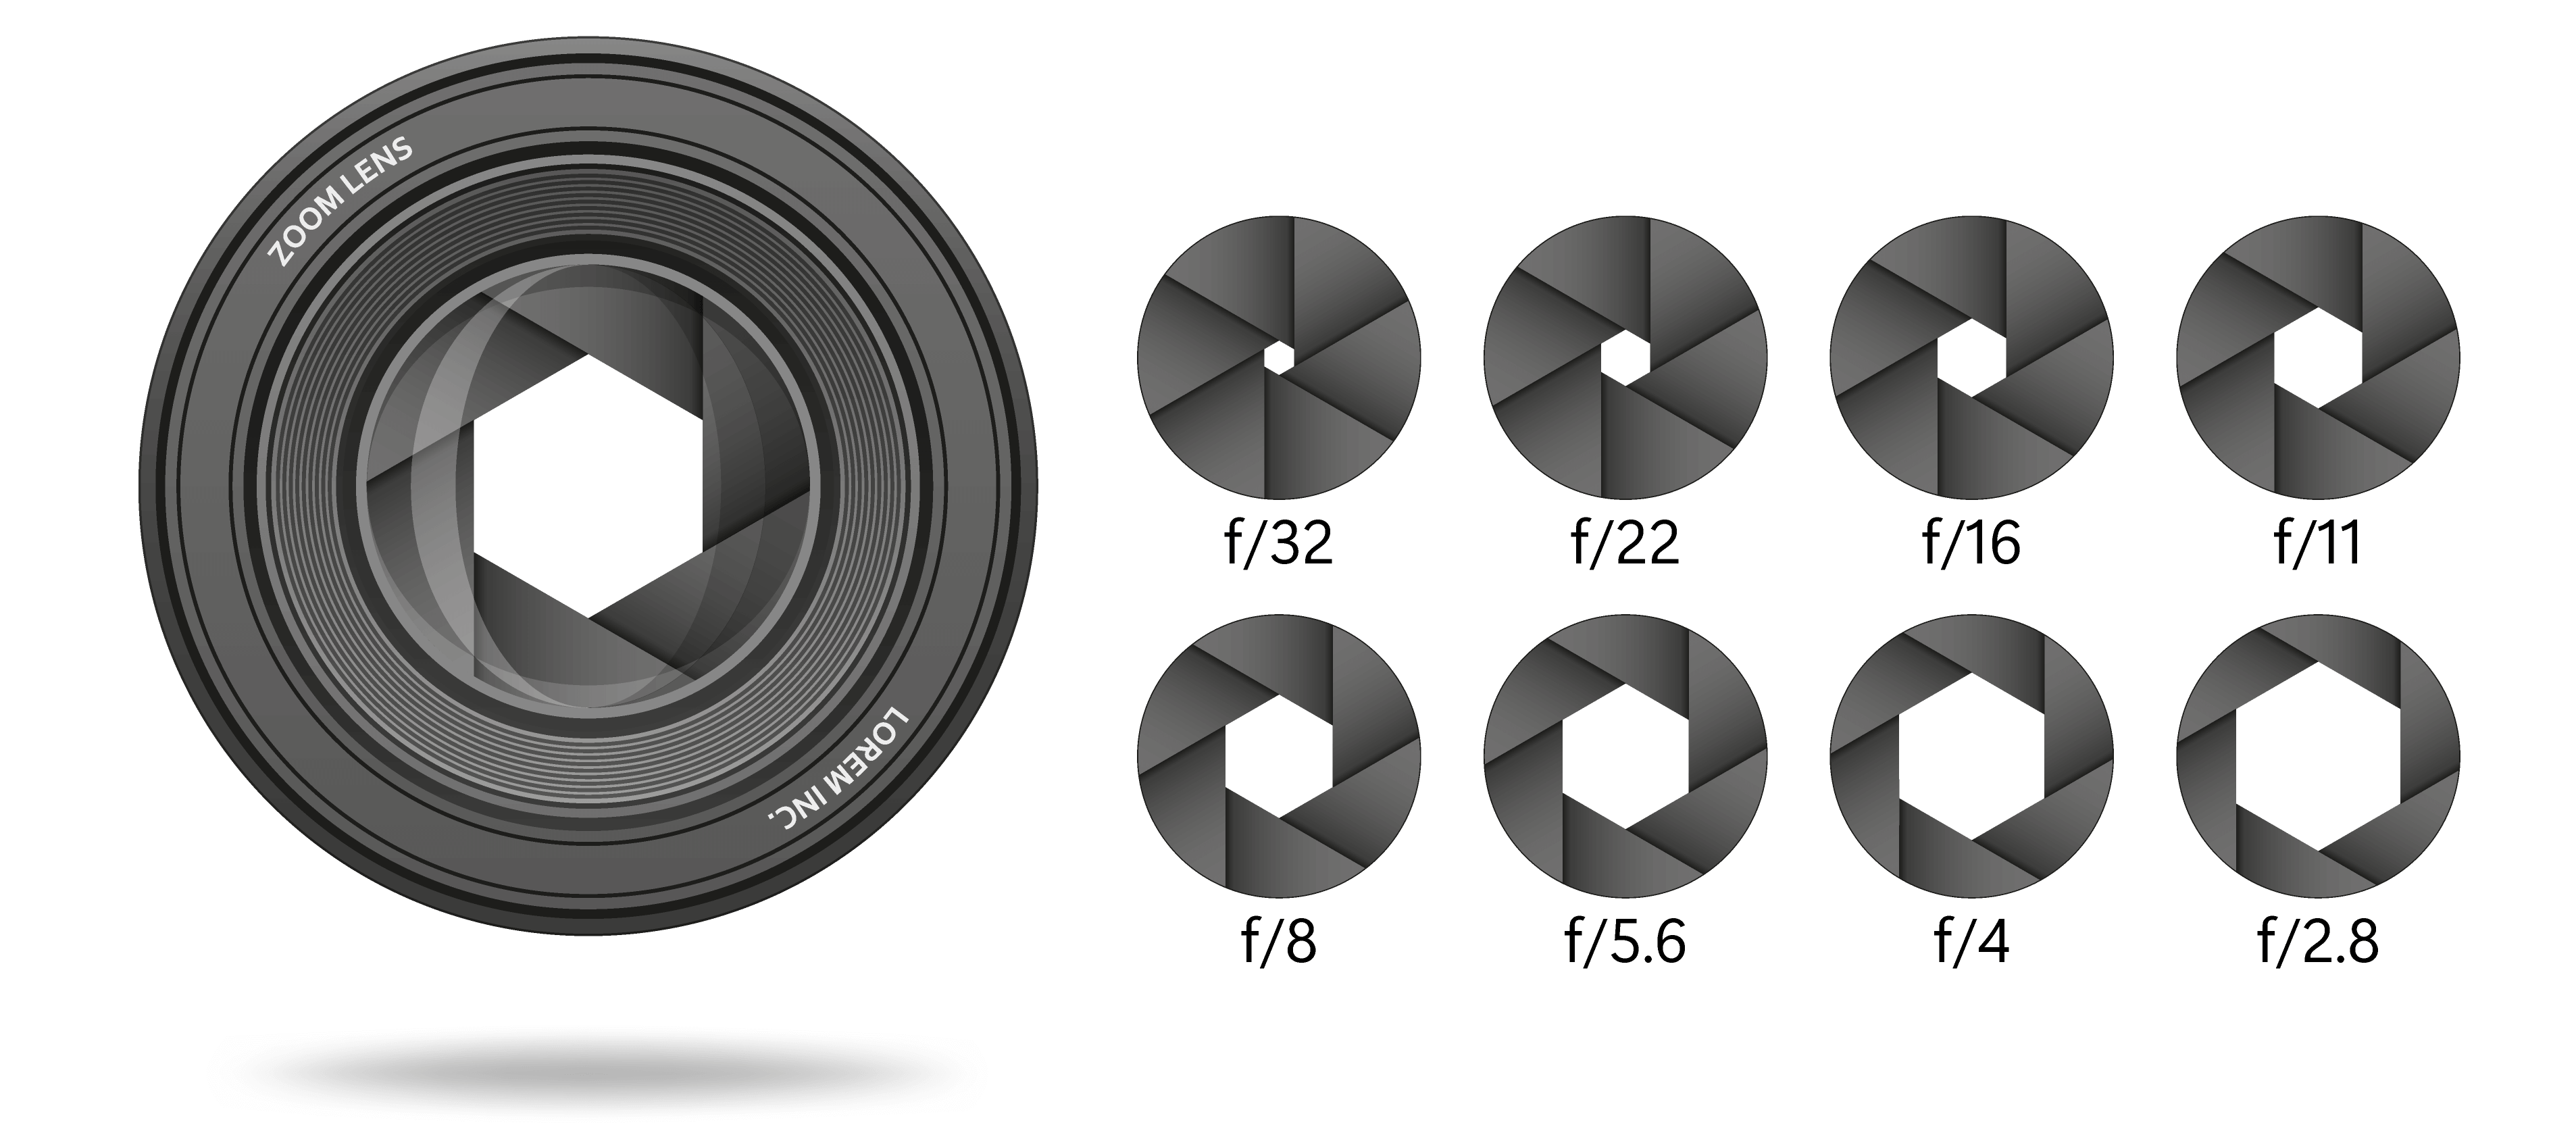
Figure 1
Depth of field (DoF) is the distance between the closest and farthest points that appear sharp in a photo. It is one of the most powerful composition tools available to a photographer.
The photograph in Figure 2 appears sharp throughout the entire frame, including the first meter in front of the photographer and the city skyline on the other side of the river. This effect, known as a large or extended depth of field, was achieved by using a high f-number, specifically f/14. In contrast, the photo in Figure 3 has a shallow, limited, or small depth of field, with only the flower itself in focus and everything else behind it blurred. To create this effect, the photographer chose a low f-number - f/2.8.
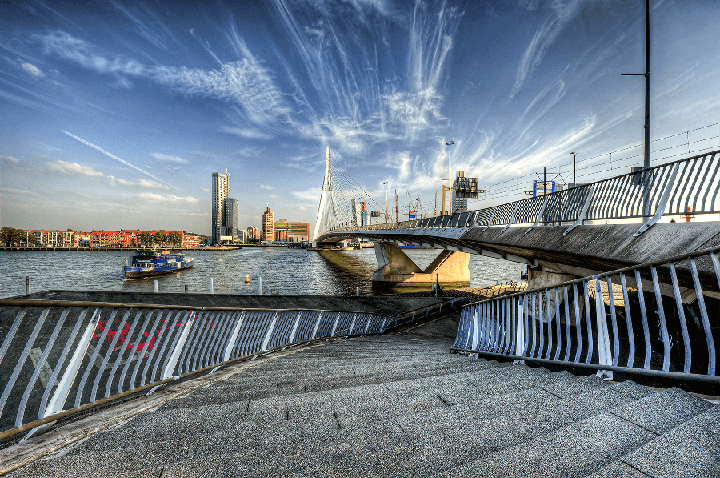
Figure 2
The importance of depth of field as a composition tool cannot be overstated. Suppose the photographer decided to create a large depth of field for the photo of the flower. The entire image would appear sharp in such a scenario, including the village behind the flower. The flower would lose its prominence as everything in the photo would attract equal attention from the viewer. The viewer would search for a structure and logic in the image, trying to determine what the subject is supposed to be. As you can see, a large depth of field would be a disastrous mistake if the photographer intended to capture the flower as the focal point. Depth of field is a decision that must be made correctly; otherwise, the photograph will most likely fail.
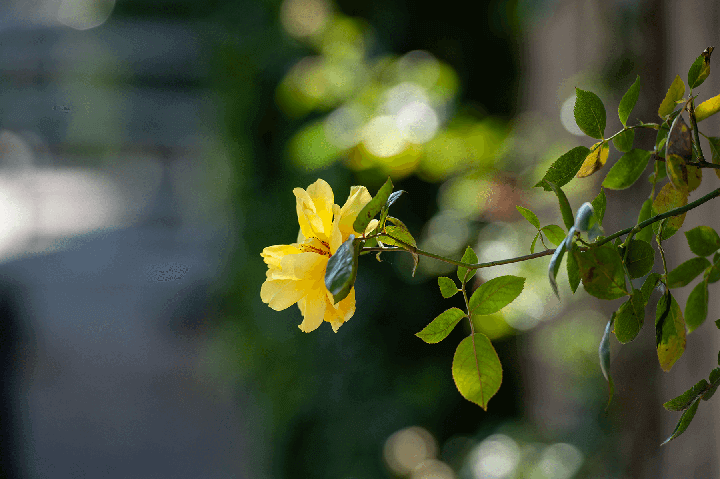
Figure 3
In Figure 4, you can again view the effects you can create using the aperture priority mode. Analyze the series of photos depicting the same subject and the corresponding f-numbers (and aperture sizes) below. The first photo shows a landscape with a person standing in it. As we move towards lower f-numbers in the subsequent images, the background gradually becomes blurry, resulting in the final photo, which is a pure portrait - something entirely different from the original image. All this has been achieved by simply adjusting the depth of field.
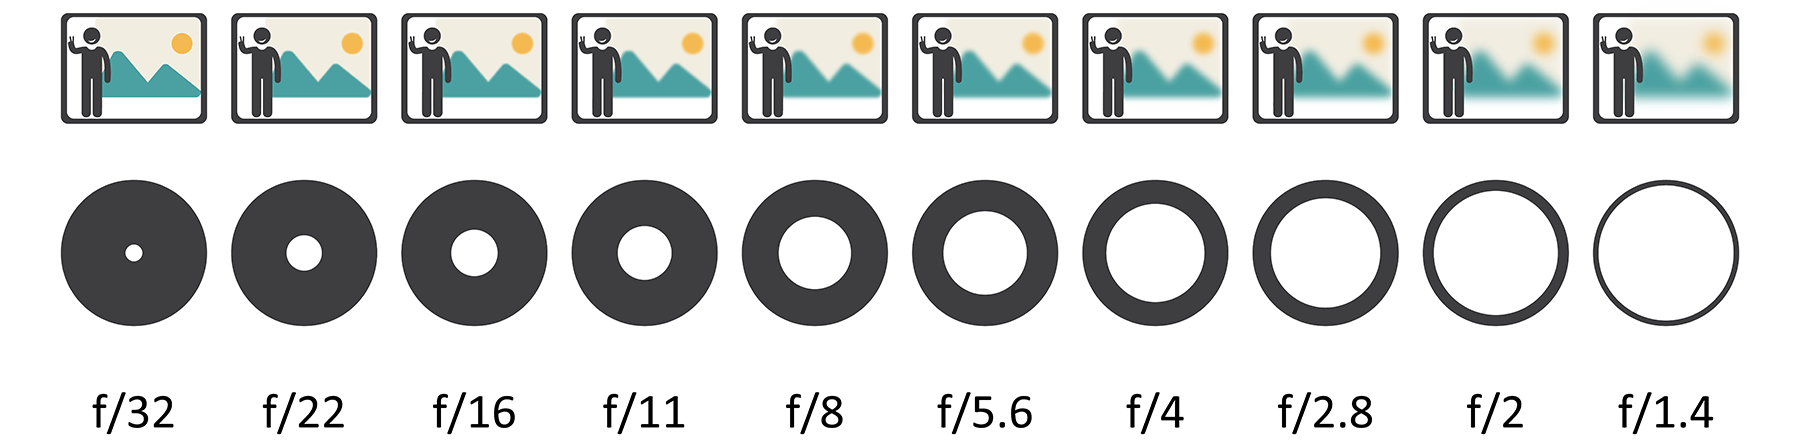
Figure 4
THE LOGIC BEHIND THE CHOICES
When is the aperture priority mode an appropriate choice?
When is using aperture priority mode a good idea? Responding, “I plan to use this mode when capturing stationary subjects”, would demonstrate your comprehension of the subject matter. A more sophisticated answer would be, “I will use the aperture priority mode whenever my main priority is to achieve a particular depth of field in a photo.”
So, whenever you want to capture a photograph in which both the foreground and background appear sharp or where only the foreground or background is sharp while the other is blurry, you can accomplish this in the aperture priority mode by choosing an appropriate f-number.
Acknowledge that photography is a “business” of priorities. You must begin by taking the necessary steps to achieve your main priority. Then, you can move on to your second, third, and subsequent priorities based on your intention and see how far you can go. However, if you fail to meet your main priority - which in this case is achieving a particular depth of field - your photograph will be ruined.
THE LOGIC BEHIND THE CHOICES
How to determine an appropriate f-number?
Another decision to make is the appropriate f-number. This is an easy call. If you want everything in the photo to be sharp (large depth of field), you need to set a high f-number and vice versa. If you’re aiming for a shallow depth of field, where only a part of the image is sharp and the rest is blurry, opt for a low f-number. How high or low the f-number must be depends on a few factors, such as the lens you use (focal length) and your intent.
Read part TWO